If your toilet won’t stop running, you’re usually dealing with either a worn flapper or a fill valve that won’t shut off. You can lift the cistern lid and check whether water’s spilling into the overflow tube, or if the flapper isn’t sealing cleanly. Start by turning off the isolation valve and flushing the tank empty, then adjust the float and refill tube so it can’t siphon. Next, you’ll sort chain slack and the valve seat—because one small misfit keeps the whole system noisy.
Key Takeaways
- Diagnose the cause: steady hiss suggests fill valve trouble; periodic refilling suggests a flapper leak; confirm with a food-colouring dye test.
- Check water level: it should sit about 25mm below the overflow tube; lower the float if water reaches the overflow.
- Inspect the overflow and refill tube: ensure the overflow isn’t cracked, and keep the refill tube above the overflow, not submerged.
- Fix the flapper seal: clean the flush valve seat, ensure the chain has 5–10mm slack, and replace the flapper if worn.
- Service the fill valve: adjust the float, rinse debris, replace washers/diaphragm, or replace the valve if it won’t shut off.
Is Your Running Toilet Flapper or Fill Valve?
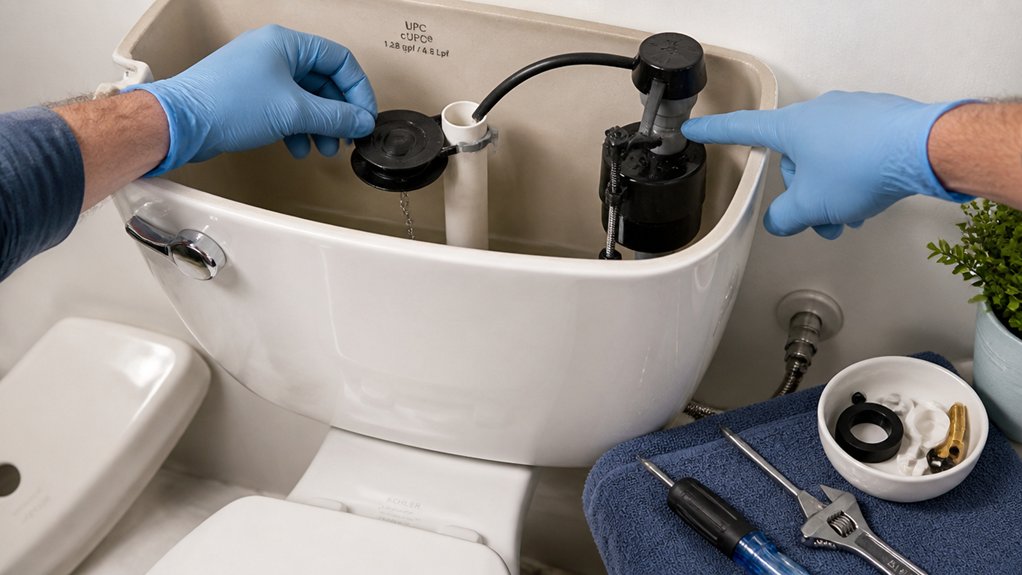
Before you reach for a spanner or call a plumber, you’ll save time by working out whether the problem sits with the flapper (the rubber seal on the flush valve) or the fill valve (the inlet mechanism that refills the cistern).
Listen first: if you hear a steady hiss, the fill valve’s likely not shutting off. If you hear periodic refilling with no hiss, water’s probably leaking past the flapper and triggering the refill.
Add a few drops of food colouring to the Toilet tank and wait 10 minutes without flushing; colour in the pan points to a flapper leak. If it stays clear, lift the float gently; if the sound stops, adjust or replace the fill valve.
Check your flush mechanism linkage isn’t snagging.
Lift the Lid and Check the Overflow Tube
Lift the cistern lid and find the overflow tube—the vertical standpipe near the middle that the flush valve sits around.
Check where the water line sits compared to the tube’s top; it should be roughly 25mm (about 1 inch) below it.
If the water’s at or above that point, you’ve likely found why it keeps running.
Locate The Overflow Tube
Once you’ve taken the cistern lid off and set it somewhere safe, look for the overflow tube—a vertical plastic pipe standing near the centre of the cistern, usually attached to the flush valve. It’s the safety outlet that stops the cistern spilling over, so you need to identify it before you touch anything else.
Trace it down to where it meets the flush valve body, then follow upwards to its open top. You’ll often see a small refill hose clipped into it; note how it’s fixed so you can refit it neatly later, which helps toilet aesthetics during bathroom remodeling.
If the tube’s cracked, loose, or badly seated, you’ve likely found a culprit. Wipe condensation, and check for limescale build-up around joints and clips.
Check Water Level Height
How high is the water sitting in your cistern right now? Lift the lid carefully and look for the overflow tube (standpipe) in the middle. The correct level usually sits about 25mm (1 inch) below the top of that tube.
If the water’s touching the rim or trickling into the tube, your toilet will keep running and you’ll waste litres—bad for Water conservation and your bill.
Check whether the float (ball or cup) is holding the fill valve open. Nudge it down; if the flow stops, the level’s set too high.
Use basic Plumbing tools—a screwdriver or small spanner—to adjust the float arm screw or clip, then flush and recheck. Repeat until it settles below the overflow tube.
Turn Off the Water and Empty the Tank
Before you touch any internal parts, shut off the toilet’s water supply at the isolation valve on the pipe below or beside the cistern and turn it clockwise until it stops. Then flush to drain the cistern and hold the handle down to empty as much water as possible.
Lift the lid carefully and set it on a towel to protect your tiles.
If the valve’s stiff, use an adjustable spanner gently—don’t force it, as older UK fittings can shear.
Mop up the remaining water with a sponge or small jug into a bucket, so you can work cleanly and spot drips fast. This also prevents splashes that ruin toilet aesthetics during bathroom remodeling.
Finally, crack open a nearby cold tap to relieve pressure, and keep a cloth handy for the fill pipe.
Adjust the Float to Stop Overfilling
If the cistern keeps topping up and you can hear water trickling into the pan, the float’s set too high or it’s sticking and not shutting the fill valve off in time. Remove the lid and check the water line sits 20–25mm below the overflow.
On a modern UK fill valve, turn the adjustment screw or slide the clip down the float rod to lower the shut-off point.
On older ball-and-arm types, gently bend the arm down a touch.
Make sure the float moves freely and doesn’t rub on the cistern wall, especially with uneven Toilet tank materials like plastic mouldings or ceramic seams.
Clean limescale and grit caused by Toilet water chemistry (hard-water deposits) so the valve seals cleanly. Refill and recheck.
Set the Refill Tube So It Won’t Siphon
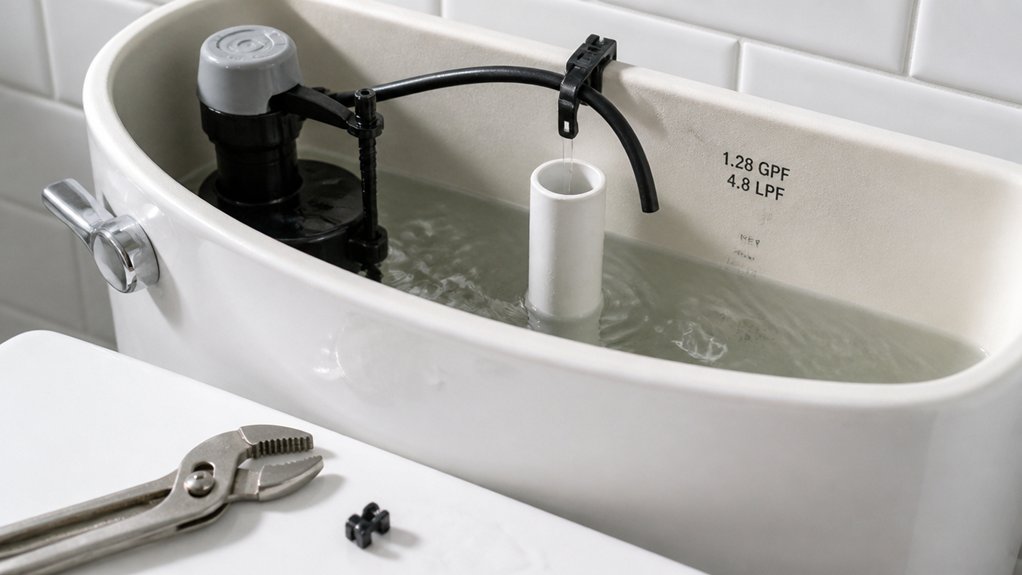
Next, check the refill tube: if it’s pushed down into the overflow pipe or kinked, it can keep the toilet running.
Clip it so it sits just above the top of the overflow—never submerged—so water flows in freely without creating a siphon.
That small height gap stops backflow into the cistern and prevents the fill valve from cycling on again.
Identify Refill Tube Issues
Although the fill valve usually gets the blame, a mispositioned refill tube can keep your toilet running by silently siphoning water from the cistern into the pan. Lift the lid and watch where the Refill tube discharges: it should feed the overflow, not sit submerged. If it’s pushed too far in, it can act like a straw and drain the cistern between fills.
- Check the tube isn’t kinked, split, or stretched tight against the float.
- Look for blockage debris at the tube end and in the overflow opening.
- Make sure the clip holds the tube above the overflow’s water line.
- Confirm the tube isn’t routed below the cistern’s normal fill level.
After cleaning and re-clipping, flush once and listen for refilling to stop.
Set Proper Tube Height
A refill tube can still siphon even when it’s clean and unclipped properly, so set its height to prevent any “straw” effect. You want the tube to deliver water into the overflow without sitting low enough to dip into standing water.
Start by lifting the cistern lid and checking where the refill tube ends. Trim it only if it’s excessively long, then refit it so the tip sits above the top of the overflow tube by a few centimetres.
Aim the stream down the overflow, not against the side of the cistern. Confirm the clip holds the tube securely and won’t slip during flushing.
This proper tube positioning helps the fill valve shut off cleanly.
As part of overflow tube maintenance, wipe the overflow rim and ensure it’s not cracked or bent.
Prevent Siphoning Backflow
If your refill tube sits too low, it can siphon water back into the cistern and keep the toilet topping up even after the fill valve’s shut. Fix it by ensuring there’s an air gap: the tube must discharge above the overflow (standpipe), not down inside it.
Clip the tube to the overflow with the supplied retainer, then trim the tube if it’s too long so it can’t droop.
- Check the tube end sits 20–25mm above the overflow lip
- Fit or replace the plastic clip on the overflow pipe
- Route the tube without kinks, dips, or tension from the lid
- Flush twice and watch: water should stop cleanly at the set level
This quick Plumbing maintenance step improves Water conservation and stops hidden trickle losses.
Fix Chain Slack So the Flapper Closes
When the lift chain’s too slack or too tight, it stops the flapper from seating properly and your loo can run on. Lift the cistern lid and flush once to watch the movement.
You want minimal Chain slack: about 5–10 mm of free play when the handle’s at rest, so the flapper drops cleanly.
If the chain’s too loose, move the clip to a higher link, or shorten the chain on the lever arm.
If it’s too tight, drop the clip down a link so the flapper isn’t held open.
Check the chain isn’t snagging on the overflow tube or rubbing the flush valve.
Test a few flushes and confirm consistent flapper closure without the handle sticking.
Adjust again until it settles.
Clean the Flush Valve Seat for a Better Seal
Even with the chain set correctly, a crusty flush valve seat can stop the flapper sealing and let water trickle into the pan. Turn off the isolation valve (usually on the pipe below the cistern), flush, then sponge out the remaining water so you can see the seat clearly.
Using basic Plumbing tools, gently remove limescale and grit without gouging the plastic or porcelain.
- Shine a torch around the seat to spot pits and scale
- Wipe with a non-scratch pad and white vinegar solution
- Use an old toothbrush to clean right into the rim
- Rinse, then run your finger round to confirm it’s smooth
Finish by refilling and doing a dye test (food colouring works) to check the seal. This Toilet maintenance step often stops constant running.
Replace the Toilet Flapper (Fast Fix)
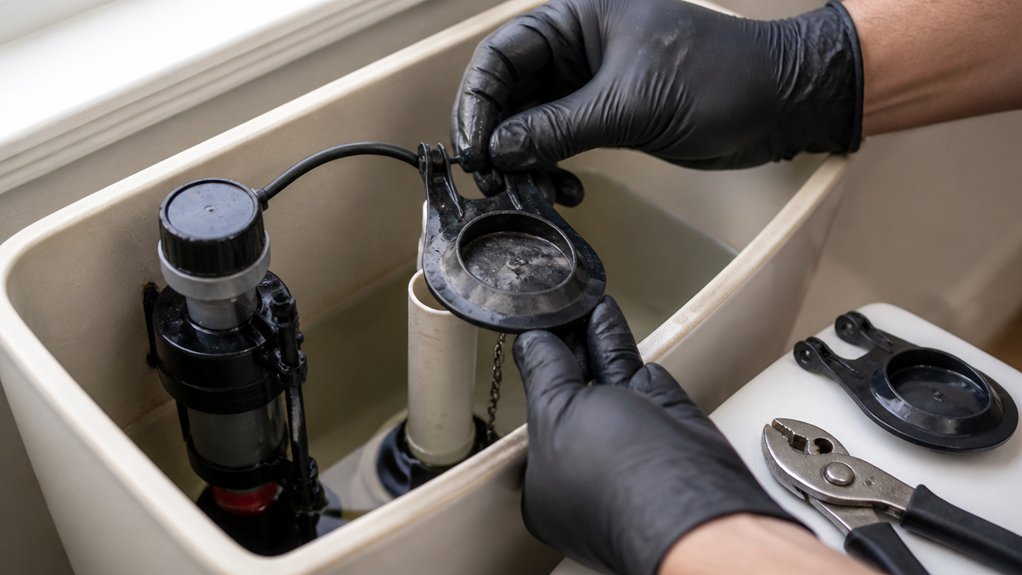
Because a worn flapper can’t hold a watertight seal, swapping it out is often the quickest way to stop a cistern that keeps refilling. Turn off the isolation valve, flush to empty the tank, then sponge out the last bit of water so you can see what you’re doing.
Unclip the old flapper from the overflow tube and unhook the chain from the flush lever.
Take the old flapper to a UK DIY shop to match size and fixing style, then fit the new one snugly on the seat. Reattach the chain with slight slack so it doesn’t hold the flapper open.
Turn water back on and test. This simple swap supports Water conservation and suits any Toilet bowl design.
Fix or Replace the Fill Valve If It Won’t Shut Off
If a new flapper still leaves the cistern topping up, the fill valve (the inlet valve on the left side of most UK close-coupled toilets) likely isn’t shutting off at the correct water level. Turn off the isolation valve on the supply pipe, flush, then remove the lid.
Set the float so the water stops 25mm below the overflow; on modern valves you’ll twist the adjuster screw or clip. If it still runs, grit may be holding the seal open—rinse the valve under the tap or replace the washer.
- Check float height and travel isn’t snagging
- Inspect the diaphragm/washer for wear
- Clean limescale and debris from the valve seat
- Replace the valve if parts don’t match
Good Plumbing maintenance supports Water conservation and lowers bills too.
Conclusion
Once you’ve checked the flapper, chain, float, refill tube, and fill valve, you’ll usually stop that endless trickle for good. It’s worth doing: a running toilet can waste around 400 litres a day, enough to fill several baths and quietly push up your water bill. Keep the water level about 25mm below the overflow tube, make sure nothing siphons, and swap worn parts promptly. You’ll save water, money, and hassle.
About the Author