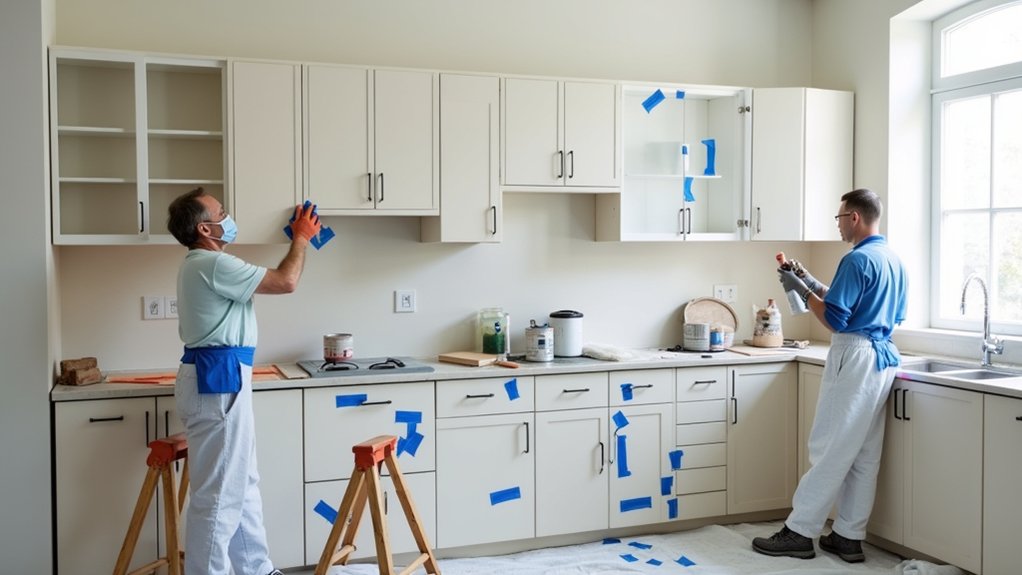
If your oak cabinets look orange under new LED lighting, you can repaint them and make the whole kitchen feel current. You’ll start by deciding whether the boxes are worth saving, then pick a primer and cabinet-grade paint that won’t chip. Next, you’ll label doors, strip hardware, and clean off grease before sanding and patching. The difference comes down to prep, dry time, and curing—and one small shortcut can ruin the finish…
Key Takeaways
- Inspect cabinet structure and materials; paint solid wood or quality MDF, but replace swollen particleboard, peeling laminate, or thermofoil.
- Degrease thoroughly, rinse, dry, then remove and label doors, drawers, hinges, and hardware for accurate, easy reassembly.
- Sand glossy surfaces 120–150 grit, refine 180–220, repair dents and holes, then vacuum and tack for a dust-free finish.
- Prime with a bonding or stain-blocking, sandable primer; let cure fully, then lightly sand 320 grit before painting.
- Apply 2–3 thin coats of cabinet enamel, drying 4–8 hours between coats; rehang after 48 hours and cure 7–14 days.
Should You Paint or Replace Kitchen Cabinets?
Why swap out your cabinets if a fresh coat of paint can deliver the same “new kitchen” impact for a fraction of the cost? If your boxes are solid, doors align, and you’re not fighting chronic swelling or delamination, painting is the practical move—and it tracks with today’s trend toward warm whites, muted greens, and soft greiges.
Check Cabinet durability: tug on rails, inspect hinge screw holes for stripping, and look for water damage around sinks and dishwashers.
Then weigh Material considerations. Real wood and quality MDF typically refinish well; thermofoil, peeling laminate, and heavily chipped melamine often signal replacement, not paint.
Also replace if you need a new layout, deeper storage, or better-functioning hardware clearances.
Choose Cabinet Paint, Primer, and Tools
Once you’ve decided to paint, you’ll get the best results by choosing a cabinet-grade paint that matches your finish goal—today’s go-to options are durable waterborne alkyds or high-quality acrylic enamels.
You’ll also need a bonding primer that grips slick factory finishes and blocks stains so your color stays even and chip-resistant.
Finally, set yourself up for a pro-level outcome with the right tools: angled sash brush, foam roller or sprayer, fine-grit sanding pads, tack cloth, and painter’s tape.
Selecting The Right Paint
Before you crack open a can, take a beat to choose a cabinet-specific paint system—paint, primer, and the right tools—because that combo determines whether your finish levels out like factory work or chips the first time you bump it with a pot.
Start with your Color schemes: warm whites and greiges stay timeless, while muted sage or inky navy feel current without screaming “trend.”
Then match paint finishes to how you live—satin for easy wipe-downs, semi-gloss for maximum durability, matte only if you’ll baby it.
Stick to cabinet-and-trim enamel labeled for blocking and leveling, and don’t mix brands within the system.
- Waterborne alkyd enamel for smoothness
- Acrylic enamel for fast dry time
- 2″ angled sash brush for rails
- 4″ foam roller for flats
- Fine sanding sponge between coats
Choosing A Quality Primer
If you want your cabinet finish to stay hard, smooth, and stain-resistant, pick a primer that matches both your cabinet material and the paint system you’ve chosen.
For bare wood or MDF, use a high-build, sandable primer to level grain and edges.
For previously painted cabinets in good shape, a bonding primer boosts adhesion improvement and reduces the chance of peeling at corners and profiles.
Prioritize primer quality over “all-in-one” shortcuts, especially in today’s busy kitchens where grease, steam, and cleaners test every layer.
Choose stain-blocking options if you’ve got oak tannins, knot bleed, or past smoke.
If you’re painting over slick laminate or thermofoil, select a specialty bonding primer rated for glossy substrates.
Let the primer cure per the label before you topcoat.
Essential Painting Tools
Although technique matters, your results depend just as much on choosing cabinet-grade paint, a compatible primer, and the right applicators for the job. Pick a waterborne alkyd or acrylic enamel in a satin or semi-gloss—today’s go-to for durability and easy cleanup—and match it with a bonding primer made for slick finishes. Test paint consistency: it should level without running, so you minimize brush strokes and get a factory-smooth look.
- High-quality angled sash brush for edges and profiles
- 4-inch microfiber or foam mini-roller for flat panels
- Paint strainer and stir sticks to keep finish uniform
- HVLP sprayer (optional) for ultra-smooth, trend-right results
- Tack cloths, painter’s tape, and drop protection for clean lines
Clean, Label, and Remove Cabinet Doors
Before you paint, you’ll degrease every cabinet surface so primer bonds cleanly and today’s smooth, factory-style finishes don’t fish-eye.
Next, you’ll label each door and every hinge, screw, and knob with matching tape marks or baggies, so reassembly’s fast and mistake-free.
Then you’ll remove doors safely by supporting the weight as you back out screws and stacking pieces on padded spacers to prevent dings.
Degrease Cabinet Surfaces
Ever wonder why fresh cabinet paint chips or fisheyes even when you’ve “cleaned”? It’s usually leftover cooking oils, silicone polishes, or hand grime hiding in corners. Before you sand or prime, treat degreasing as non‑negotiable cabinet cleaning and the foundation of your surface preparation.
- Open windows, run a fan, and wear gloves for solvent-safe work.
- Vacuum dust first so you don’t smear grit into the finish.
- Wash with a degreaser (TSP substitute or alkaline cleaner) and hot water.
- Scrub profiles, pulls’ ghost marks, and hinge areas with a nylon brush.
- Rinse twice, then wipe with clean microfiber until no residue shows.
Finish by letting everything dry fully; trapped moisture can telegraph through modern low‑VOC primers.
Label Doors And Hardware
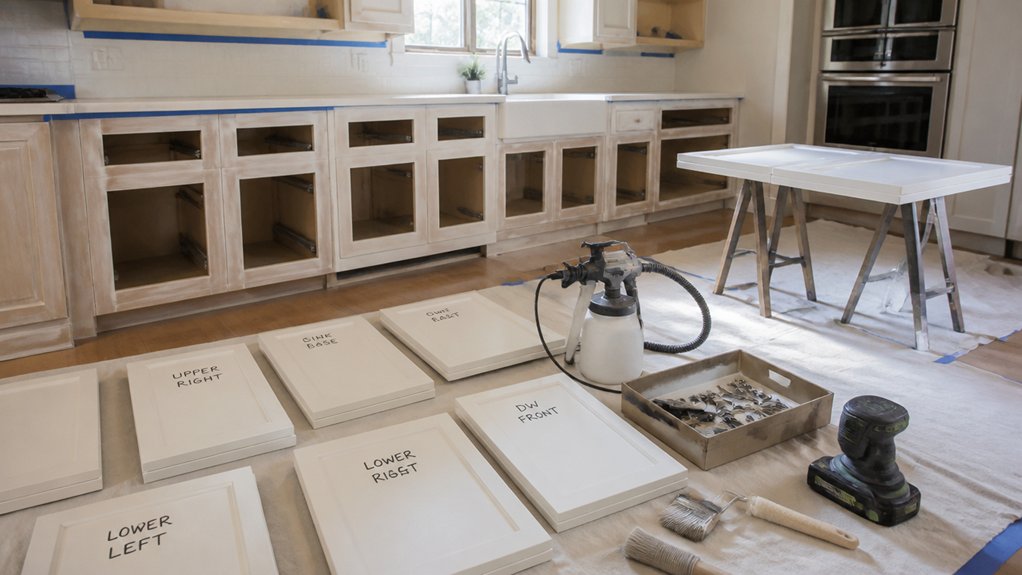
Once your cabinets are degreased and dry, label every door, drawer front, and hinge set so reinstalling doesn’t turn into a guess‑and‑check puzzle. Use painter’s tape on the inside edge (not the face) and write a simple code: U1, U2 for uppers; L1, L2 for lowers; plus “L/R” for left or right swing.
For hardware organization, match each code to its screws and hinges in a small zip bag, then place bags in a divided organizer or lidded bin.
Snap a quick photo of each opening and hinge orientation—phone pics are today’s pro move.
If you’re mixing old and new pulls, mark which holes you’ll reuse. Keep labels consistent, legible, and moisture‑resistant so they survive sanding and priming.
Remove Doors Safely
Although it’s tempting to start unscrewing hinges right away, you’ll get cleaner results—and avoid chipped paint and bent hinge arms—by removing cabinet doors with a simple, controlled routine.
Start by wiping doors and frames with a degreaser so your tape labels stick and grit won’t scratch during hinge removal.
Work one door at a time, and use steady door support: a small stool, shim, or helper hand keeps weight off the screws.
Bag hardware by location and snap a quick photo to match modern soft-close parts later.
Then lift the door straight off and store it flat to prevent warping.
- Degrease around hinges and pulls
- Add painter’s tape labels
- Support the door before loosening screws
- Remove hinges, then lift cleanly
- Stack doors with spacers and notes
Sand, Repair, and Dust-Proof Cabinets
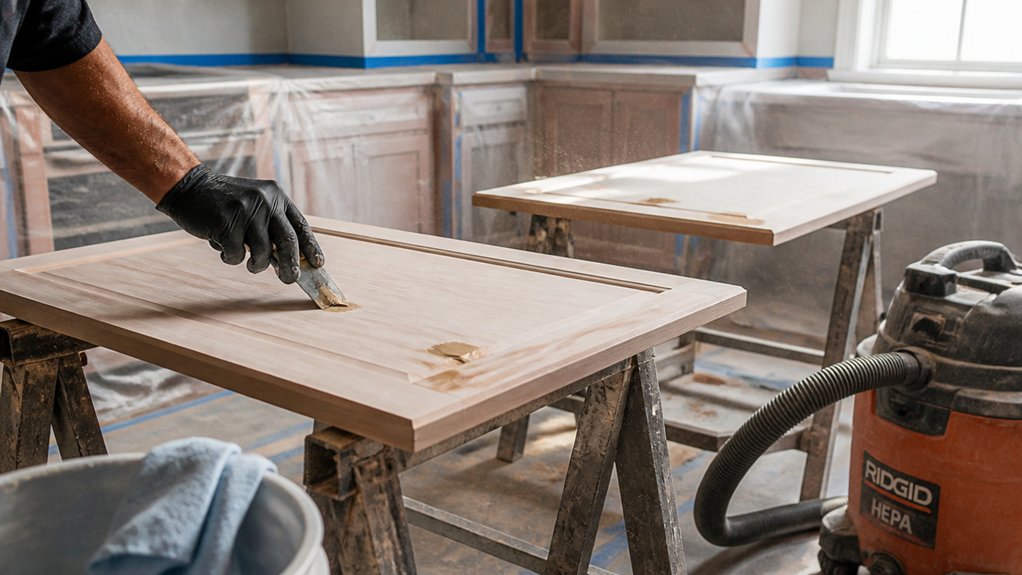
Before you pick up a paintbrush, how smooth—and clean—are your cabinet surfaces really? Start with cabinet sanding: scuff glossy finishes with 120–150 grit, then refine with 180–220 for a modern, furniture-smooth feel. Sand with the grain, and break sharp edges lightly so paint won’t chip later.
Vacuum as you go so grit doesn’t re-scratch.
Next, repair like a pro: fill dents, seams, and old hardware holes with a stainable or paintable wood filler, then sand flush once it cures.
Tighten loose joints and replace swollen particleboard corners instead of “patching” forever.
Finish with dust proofing techniques: HEPA-vac, tack cloth, then wipe with a damp microfiber.
Let everything dry completely before moving on.
Prime Kitchen Cabinets for Adhesion and Leveling
Your sanding and dust-control work sets the stage; primer is what locks that surface down and gives you a flatter, more even canvas for paint. Treat this as the make-or-break step for adhesion and leveling, especially on slick factory finishes or previously coated doors.
Keep Surface preparation tight: wipe with a tack cloth, then handle pieces by edges to avoid skin oils.
- Choose a bonding primer for laminate, varnish, or glossy enamel.
- Spot-prime repairs first so filler doesn’t “flash” through.
- Strain primer and use a fine microfiber roller for a modern, low-texture look.
- Back-brush lightly to lay off ridges and chase bubbles.
- Sand lightly after it dries, then vacuum and tack again.
For primer application, work in thin, even passes and maintain a wet edge to prevent lap marks.
Paint Kitchen Cabinets: Coats, Dry Time, Curing
Once the primer’s sanded smooth and fully dry, you can move into paint with a plan that prioritizes thin coats, clean dry times, and real curing—not just “dry to the touch.” Use a cabinet-grade enamel (waterborne alkyds and modern acrylic-urethane blends are popular for their hardness and lower odor), then apply two to three light coats with a fine microfiber roller or sprayer, tipping off edges to prevent curtains and orange peel.
Work in 65–75°F with low humidity, and let each coat dry per label—usually 4–8 hours—then lightly scuff with 320 grit for grip. Save brush techniques for profiles: load lightly, keep a wet edge, and lay off in one direction.
Choose paint sheen intentionally: satin hides flaws; semi-gloss cleans easiest. Rehang gently after 48 hours, but wait 7–14 days for full cure.
Conclusion
When you repaint instead of replace, you’re not just saving money—you’re rewriting your kitchen’s mood. One weekend, my neighbor spent $280 on primer, paint, and a new pull set; the “dated oak cave” turned into a bright, modern galley by Monday. Treat each step like a playlist: label, clean, sand, prime, then lay thin coats with patient dry times. Let it cure fully, and you’ll feel that fresh‑start click every time.
About the Author