
You probably don’t know that many listings are priced to trigger bidding behavior rather than reflect recent sold prices on the same street. If you treat the headline price and glossy phrases as signals, you’ll miss the hard data hidden in what’s omitted: sparse photos, vague “updated” claims, and odd sale terms like “cash buyers only.” You can set an offer ceiling fast by cross-checking comps, floorplan quirks, and location claims—but only if you know what to flag first.
Key Takeaways
- Treat guide prices and “offers over/OIEO” as negotiation floors; anchor your maximum using recent sold comparables, not asking prices.
- Decode buzzwords as warnings: “charming/cozy” often means small; “needs modernisation” signals costs—deduct repairs from the median sold price.
- Cross-check claims with independent sources (Land Registry, council records, planning history, tenure/charges) and price uncertainty as risk.
- Read photos and floorplans for hidden space loss and defects—wasted hallways, awkward shapes, stains, rippled floors—then budget for fixes.
- Use listing red flags (few photos, vague wording, “cash buyers only,” frequent reductions, long days on market) to strengthen leverage and cap offers.
Benchmark the Estate Agent Listing Price to Sold Comps
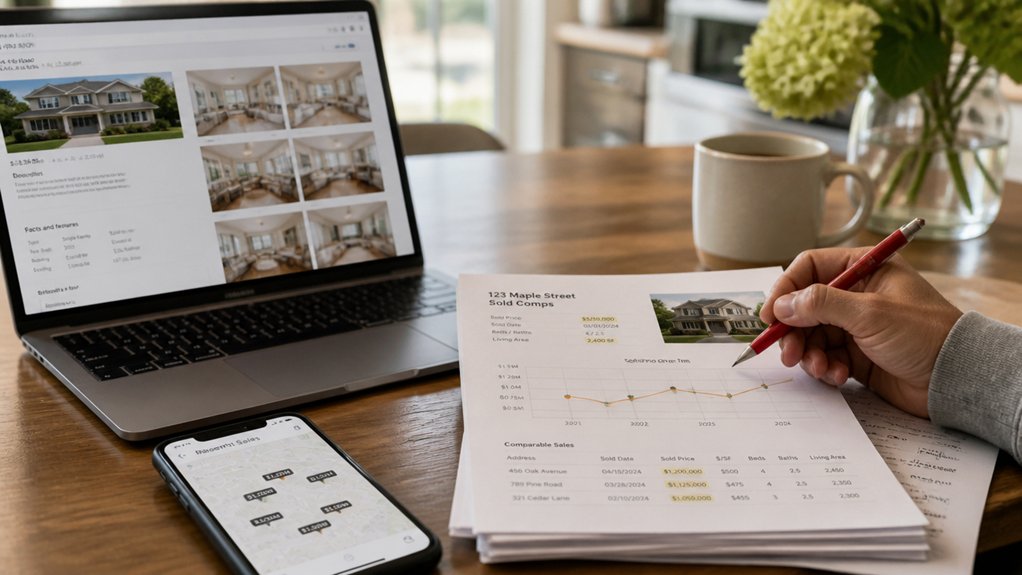
Next, map the sold range and where this home sits inside it. If it’s above the 75th percentile, you’ll need proof—new roof, remodel permits, or superior location.
Fold in Market trends by checking whether sale-to-list ratios are rising or falling. That keeps your Property valuation grounded and helps you bid like you belong.
Decode Estate Agent Listing Buzzwords (and What They Hide)
Although listing descriptions read like marketing, the buzzwords often flag pricing risk if you know what they’re papering over: “cozy” usually means small square footage, “charming” can mean dated systems, “as-is” shifts repair costs to you, and “priced to sell” may just be a high anchor.
Treat each adjective as a hypothesis to test. When you see “immaculate,” ask for the age of roof, boiler, and electrics; “move-in ready” should come with recent certificates and itemized upgrades. “Sought-after” needs proof: school catchment data, transport times, and comparable days-on-market.
These Marketing strategies work because they’re vague and emotional, and agent incentives reward faster, higher-fee deals. You’ll fit in with savvy buyers by requesting specifics, then pricing the risk into your offer.
Spot Pricing Tactics: Guide Price, OIEO, “Offers Over
When you see “Guide Price,” “OIEO” (offers in excess of), or “Offers Over,” assume the number is a tactic, not a valuation, and treat it as the floor the seller wants you to step above.
These labels use pricing psychology: a low anchor pulls more buyers in, then competitive pressure nudges bids upward. Your job is to reset the anchor with evidence. Compare recent sold prices per square foot on the same street, then adjust for condition and lease length or tenure.
If the guide is £300k but comps cluster at £285k–£295k, you’ve found the stretch. Use negotiation tactics that keep you in the group of serious buyers: submit a clean offer backed by comps, set an expiry, and state you won’t “bid against yourself” without written competing offers.
What the Estate Agent Listing Leaves Out (Quick Checklist)

Because listings function more like marketing briefs than disclosures, you should assume key risk data sits off-page and verify it fast with a checklist: sold-price history and prior listing prices, tenure and remaining lease length, service charges/ground rent and any planned major works, council tax band and EPC details, known defects (damp, roof, subsidence) and recent remedial work, boundary and access issues, parking rights and restrictions, planning constraints and nearby developments, and anything that blocks lending (cladding, short lease, non-standard construction).
Ask for documents, not assurances: lease, management pack, EWS1, warranties, and receipts. Cross-check with Land Registry, the council portal, and planning maps.
These steps cut through pricing strategies and agent motivations, so you’re bidding with the same facts seasoned buyers use. If anything’s missing or vague, price in risk or walk.
Read Estate Agent Listing Photos for Space, Light, and Defects
You can pull hard numbers from listing photos by using fixed objects (door frames, beds, standard appliances) to estimate room scale and layout flow.
You can also infer natural light by checking window size, shadow direction, and time-of-day cues across multiple shots.
Finally, you should scan for defects agents don’t linger on—water stains, bowed floors, patched drywall, mismatched paint, and condensation on windows—because they often signal real repair costs.
Decode Room Scale
Even if listing photos look “wide” and bright, lens tricks and staging can hide tight circulation, weak daylight, and expensive defects. To decode room scale, anchor every image to something measurable: standard internal doors (about 762mm wide), kitchen base cabinets (600mm deep), a double bed (1350mm x 1900mm), or a sofa (around 900mm deep).
If a “spacious” lounge only fits a two-seater plus a narrow coffee table, your spatial perception should flag it.
Cross-check claims against Room dimensions in the floor plan: look for pinched entry paths, furniture drawn too small, or missing radiators and built-ins.
Compare ceiling height cues: door tops near coving often signal low ceilings. You’ll spot what locals notice fast.
Track Natural Light
Room scale tells you whether furniture fits; natural light tells you whether the place feels livable at 9 a.m. and still bright at 3 p.m. Use listing photos like timestamps: note which rooms get sun in each shot, and compare window shadows to the agent’s claimed “bright” vibe.
Ask for the floor plan, then map Room orientation—east-facing bedrooms wake you gently, south-facing living rooms stay usable through winter, and north-facing spaces can read dim even when staged well.
Count windows per room and look for light-blockers like deep balconies or close neighboring walls. When you visit, bring the same expectations you built from photos, so you’re not paying a premium for lighting you won’t get.
Spot Hidden Defects
Because listing photos act like a seller-controlled inspection report, treat every image as a chance to spot defects the description won’t mention—water intrusion, uneven floors, tired mechanicals, and rushed cosmetic cover-ups.
Zoom in on ceiling corners for staining, bubbling paint, or mismatched patches that signal leaks. Scan baseboards and door gaps; irregular reveals can hint at Hidden structural movement.
Check floor reflections for ripples and slopes, then note if rugs strategically cover high-traffic areas.
In kitchen and bath shots, look for caulk lines, swelling around sink cabinets, and vent fans that appear absent.
Outside, inspect grading, downspouts, and bare soil; these Landscaping flaws often predict moisture problems.
Share findings with your agent and inspector so you’re not the only one noticing.
Use the Floorplan to Spot Layout and Size Traps
Use the floorplan to separate gross area from usable area, because a 1,000 sq ft listing can hide a much smaller liveable footprint.
Scan for wasted circulation—long hallways, oversized foyers, and dead corners that inflate the headline number without adding function.
Then check room shapes and dimensions, since narrow rectangles, angled walls, and tight clearances can make “bedroom-sized” rooms hard to furnish and easy to overprice.
Compare Usable Vs Gross Area
Even when two listings advertise the same square footage, the amount you can actually live in can differ by hundreds of square feet once you separate usable area from gross area. Don’t accept the headline number—open the floorplan and measure what you’ll furnish, sleep in, and work in.
Gross area often includes exterior walls, columns, shafts, storage lockers, and sometimes balconies. Usable area is the interior space you can occupy day to day. Ask the agent which standard they used (RICS, ANSI, local code), then request the net internal area figure in writing.
On the plan, total each room’s dimensions and compare your sum to the listing. If the gap exceeds 5–10%, treat the price per usable square foot as your real benchmark.
Spot Wasted Circulation Space
Once you’ve verified usable vs. gross area, check how much of that usable space gets burned by circulation—hallways, oversized entries, and awkward corridors that don’t fit furniture.
On the floorplan, add up passage widths and lengths and compare them to living zones; if circulation runs above ~12–15% of usable area, you’re paying for walking, not living.
Count door swings and choke points: extra lobby space and double corridors often signal poor planning. Ask for dimensions, then price per usable room-area, not total.
In Interior design terms, circulation should connect rooms, not dominate them.
Also check whether access routes to the garden force long internal paths; that adds daily friction and Garden maintenance hassle, too.
Check Room Shape Constraints
Where do those square meters actually fit—cleanly into furniture-friendly rectangles, or into tapered, kinked, and obstructed corners that look fine on paper but fail in real life? Don’t price a home off total area alone; test the Room shape against real objects.
On the floor plan, trace a 60cm circulation strip and place standard footprints: 2.0×1.6m bed, 1.8m sofa, 0.9m dining chairs. If a “12m² bedroom” only fits the bed with 30cm to the wall, it’s functionally smaller.
Watch Floor plan nuances: bay windows, chimney breasts, angled walls, radiators, and door swings that steal usable width. When you spot constraints early, you negotiate confidently—and you’ll feel at home, not cramped.
Verify the “Great Location” Claim Before You View

Because “great location” often means “great for the seller,” verify it with objective checks before you schedule a viewing. Pull a 10-minute walk map and list Neighborhood amenities you’ll actually use: grocer, GP, transit stop, park, childcare.
Then run a commute test at your real hours and check noise sources on satellite view—main roads, rail, bars, schools.
Next, compare the postcode to nearby streets using sold-price data and Local market trends: average days on market, price-per-square-metre, and the discount from asking to sold. If this home sits outside the micro-area’s norms, you’re not “being picky”—you’re protecting your budget.
Talk to residents in the queue at the café or on the school run; you’ll hear what the listing won’t say.
Use Listing Red Flags to Set Your Offer Ceiling
Although a listing can’t tell you the final sale price, it often telegraphs the seller’s leverage—and you can use those signals to set a hard offer ceiling before you get emotionally attached.
Start with Market trends: check recent sold prices per square metre, days on market, and price cuts in the postcode.
Then read for red flags that weaken the seller’s position: “priced to sell,” “cash buyers only,” “needs modernisation,” “no onward chain,” or a vague “must be seen” with few photos. Each one implies either limited demand or urgency.
Translate those into pricing strategies: cap your offer at the median sold price minus your repair budget, plus a small premium only if supply is tight.
Share your ceiling with your agent and stick to it.
Conclusion
You won’t avoid overpaying by luck—you’ll do it by treating listings like data. Benchmark the asking price against sold comps, then translate the buzzwords into likely costs. Watch for pricing lures (guide price, OIEO, “offers over”), missing details, and photo tricks. Use the floorplan to verify size and flow, and validate the “great location” with maps and crime/school stats. Do this, and you’ll save a mountain of money.
About the Author