You start by checking each tread, riser, and string for movement, rot, or heavy paint build-up, then decide whether you can key and recoat or you’ll need a full strip back to bare timber. You’ll mask skirtings, isolate the landing, and sort ventilation before dust goes anywhere near the rest of the house. Get that decision wrong, and every step after it costs you time—so what exactly should you look for first?
Key Takeaways
- Inspect treads, risers, and nosings; test the existing finish with solvents to decide whether to recoat or fully strip.
- Mask stairwell areas, ventilate well, and clean thoroughly so the surface is dry, dust-free, and ready for sanding or finishing.
- Strip paint or varnish using chemical, heat, or scraping methods; assume lead paint in older homes and use proper precautions.
- Sand progressively with the grain (typically 100–180, up to 220 grit), vacuum between grits, and remove all dust with a tack cloth.
- Repair squeaks and damage, then stain if needed and apply three thin durable coats, de-nibbing between coats and curing fully before use.
Inspect Stairs and Choose Strip vs Recoat
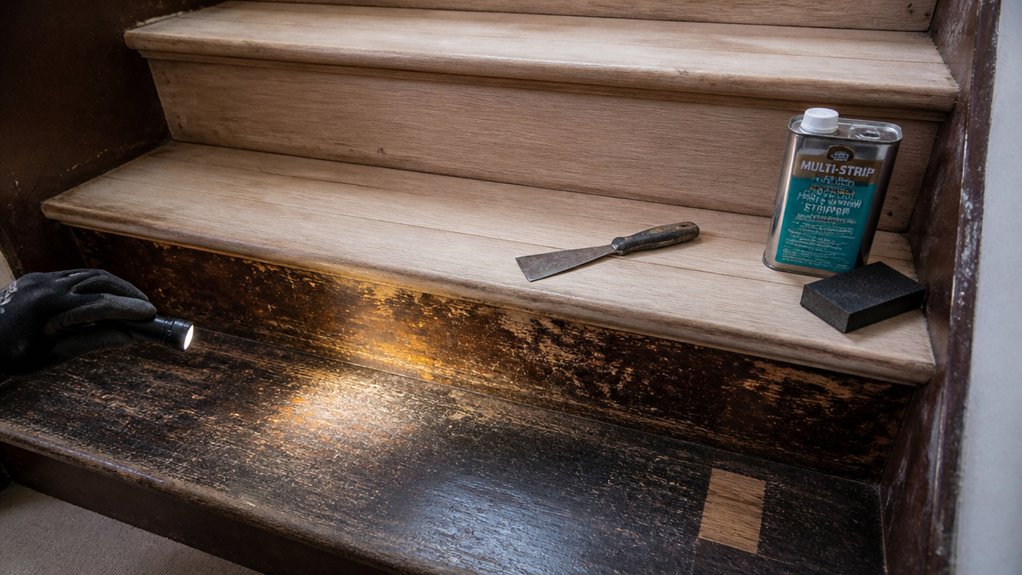
Before you reach for a sander, inspect each tread, riser and nosing in good light to decide whether you can simply recoat the existing finish or you’ll need to strip back to bare timber. Check for cupping, loose blocks, split nosings, and old filler that’s failed.
Do a small solvent test: if white spirit softens the surface, it’s likely wax or oil; if only meths dulls it, you may have shellac; tough plastic sheen suggests polyurethane.
Recoat when the film’s sound and scratches don’t cut through; strip when you see blotchy patches, peeling, or mismatched repairs.
Note staircase history and wood species—Victorian pitch pine, oak, or beech react differently and show wear patterns.
Mask Off, Ventilate, and Control Stair Dust
Once you’ve decided on strip or recoat, mask off the stairwell like you’re containing plaster dust: run low‑tack decorator’s tape along skirting boards, newel posts and balustrade bases, then hang 500–1000‑gauge polythene sheeting to seal doorways and protect adjacent carpets.
Use proper Masking techniques: overlap seams, tape the polythene to the floor, and cut a zipped access slit so you’re not constantly tearing edges.
For Dust containment, set up a cheap box fan in an upstairs window exhausting outwards, crack a downstairs window for make‑up air, and keep internal doors shut.
Fit a brush strip or draught excluder at the bottom of the stair door.
Vacuum treads and risers with a HEPA‑filtered extractor between stages, not a standard Henry.
Wear an FFP3 mask.
Remove Stair Finish: Strip, Degloss, or Scrape
Once you’ve masked up and got clean airflow, you need to decide how you’ll remove the existing stair finish—chemical stripper for thick varnish, heat for paint, or a careful mechanical approach for tight corners and spindles.
If you’re not stripping back to bare timber, you’ll degloss with abrasive pads or 120–180 grit to key the surface so the next coat grips properly.
Where the coating won’t budge on nosings or edges, you’ll scrape it back with a sharp carbide scraper, keeping the blade flat to avoid gouging the wood.
Choose Stripping Method
Although every staircase looks similar at a glance, the finish on your treads, risers, and handrail dictates the best way to remove it. Check the wood grain first: open-pored oak and ash show scratches quickly, while tight-grained beech and maple hide light marks but burnish if you over-sand.
Judge finish durability by testing a small patch with white spirit and a scraper—if it softens, a solvent-based stripper is efficient; if it flakes like varnish or polyurethane, a thicker gel stripper clings to nosings and spindles.
For paint, especially on older UK terraces, assume lead until proven otherwise and use a low-dust chemical stripper rather than aggressive sanding.
On worn shellac, a cabinet scraper gives clean control without flooding joints.
Degloss For Adhesion
If your existing stair finish is sound but too glossy for a new coat to grip, deglossing gives you adhesion without the mess of full stripping.
Start with Surface preparation: vacuum treads and risers, then wipe with sugar soap and clean water; let the timber dry fully.
Mask spindles and skirts, and keep windows open.
Use a liquid deglosser (often called liquid sandpaper in the UK) on a lint-free cloth, working in manageable sections and keeping the surface wet for the stated dwell time.
Alternatively, lightly abrade with 180–220 grit on a sanding block to key the sheen.
Wipe off residue, then tack-rag.
This Adhesion promotion step helps primers, stains, and polyurethane bond evenly, reducing fisheyes and peeling.
Scrape Stubborn Finish
Where glossers and liquid deglossers can’t bite through drips, ridges, or a brittle varnish edge, scraping gets you back to a stable layer without taking the whole staircase to bare wood. Use a sharp carbide scraper or Bahco-style pull scraper, kept square and burnished, and work with the grain on treads and risers.
Warm stubborn patches with a heat gun on low, moving constantly, so you soften finish not scorch oak or pine. Vacuum as you go; grit will gouge. Feather the margins with 120–150 grit so you don’t leave a hard step under new coats.
If you’ve done Chemical removal in corners, let residues dry fully before physical scraping, and don’t chase every stain—chase sound adhesion.
Sand Stairs Evenly (Grit Guide + Edges)
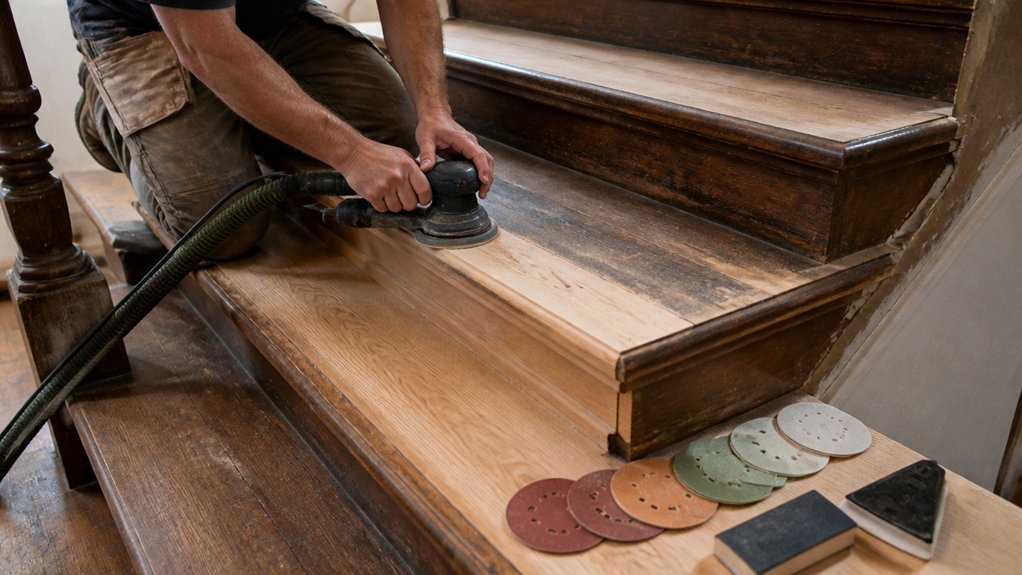
Before you pick up the sander, set yourself up for an even finish by working through the grits in a disciplined sequence and treating edges as a separate job, not an afterthought.
Start with 60–80 grit only if there’s heavy ridging; otherwise begin at 100. Move to 120, then 150–180 for most UK softwoods and oak, and stop there unless you’re oiling and want 220.
Always sand with the grain direction on treads and risers to avoid cross-scratches that telegraph under varnish.
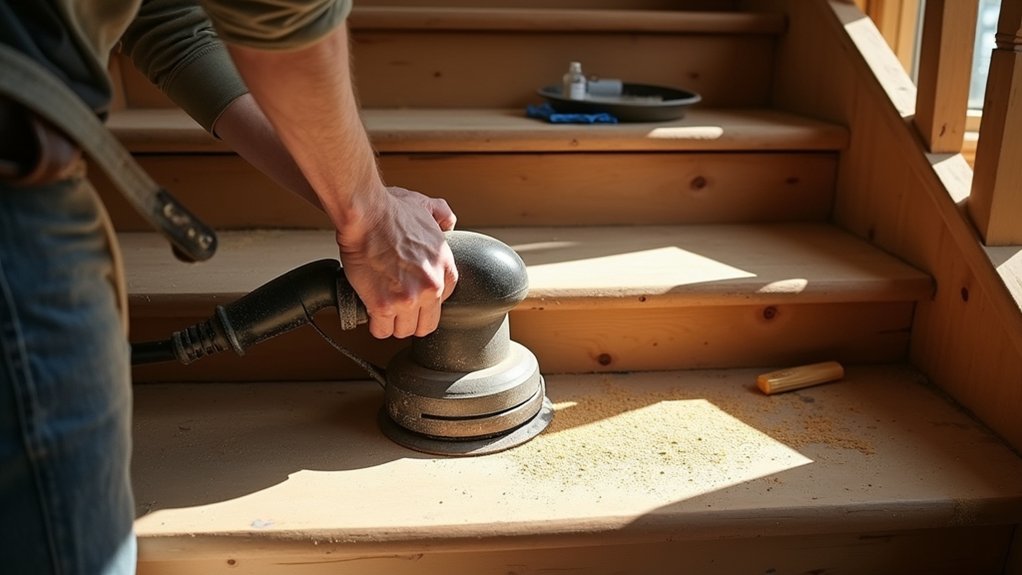
Use the right sanding tools: a random-orbit for flats, a detail sander for nosings, and a sanding block for feathering.
Do corners by hand, keeping pressure light and strokes consistent.
Vacuum between grits, then tack-cloth.
Tighten Treads, Stop Squeaks, Fill Damage
Before you seal or varnish, you’ll need to firm up any loose treads by re-fixing from underneath with countersunk screws and construction adhesive, keeping fixings clear of the nosing.
Track squeaks to tread–riser movement, then pack the joint with timber wedges or flexible grab adhesive so the boards can’t rub.
For gouges and splits, you’ll get the cleanest finish by using a stainable two-part wood filler, sanding it flush once cured.
Secure Loose Treads
Why tackle sanding and staining if your treads still flex and squeak underfoot? Start by checking handrail stability and tread safety: if the stair feels loose, you’ll never get a solid finish.
Lift any carpet edge, then inspect each tread-to-string joint for gaps, cracked glue lines, or missing fixings. Re-secure from underneath where possible: drive new countersunk wood screws through the riser into the tread, or add softwood glue blocks to the stringers with polyurethane adhesive for UK humidity swings.
If access is from above, pre-drill and plug screw heads with matching timber pellets for a neat look. Clamp bowed treads flat while the adhesive cures. Replace split wedges rather than forcing them tighter.
Fix Squeaks And Gouges
Even if the staircase feels mostly solid, a few hidden rub points and bruised fibres will still telegraph through stain and varnish. Find squeaks by walking each tread edge; mark the noise, then tighten from below with wood screws into the tread, not through the nosing. If you can’t access the underside, drive trim screws at an angle and plug the heads with matching pellets.
After paint removal, vacuum dust from joints, then stop rubbing by puffing graphite or candle wax into the contact line. For gouges, cut back ragged fibres with a sharp chisel, following the Wood grain, and degrease. Pack deep damage with two-part wood filler; use fine stopping for shallow dents. Sand flush, recheck squeaks, and wipe with white spirit.
Stain and Seal Stairs for a Tough Finish
Once you’ve sanded back to clean timber and hoovered away every trace of dust, you can stain and seal your stairs to handle daily foot traffic without looking tired.
Start with Color matching: test on an offcut or the underside of a tread, because pine, oak, and beech take pigment differently.
Choose stain types to suit the job—water-based for low odour and quick drying, solvent-based for deeper penetration, or gel stain to control blotching on softwoods.
Apply with a lint-free cloth, keep a wet edge, and wipe back evenly.
Seal with a hardwearing floor varnish: polyurethane for toughness or water-based acrylic for clearer colour.
Lay three thin coats, de-nib between with 240 grit, and let it cure fully.
Conclusion
Once you’ve inspected, stripped or recoated, sanded through the grits, and fixed squeaks with wedges, screws, and a proper wood filler, you’re ready for the payoff. Stain to your test patch, then build durability with thin coats of hardwearing polyurethane or a tough floor varnish, de-nibbing between coats. Fun fact: in the UK, replacing a staircase can easily run £2,000–£5,000+, so refinishing protects both character and budget.
About the Author