By coincidence, you’ll often spot the worst damp patch right beneath the most characterful beam. You start with a proper fabric survey, then line up consents before you touch a stone. You prioritise repair over replacement, plan the layout around the bays and headroom, and route services where chasing won’t scar historic plaster. You insulate with breathable layers and add ventilation so moisture can’t get trapped—but the first decision that really sets the tone is…
Key Takeaways
- Survey the whole structure, tracing damp sources, timber decay, and crack patterns before designing any intervention.
- Confirm listing status and required consents early, preparing drawings and heritage method statements to align approvals, cost, and programme.
- Prioritise “retain and repair” original fabric, replacing only beyond-saving elements with matching profiles, species, and finishes.
- Use breathable, heritage-friendly materials—lime mortar, vapour-open insulation, linseed putty, and patinating metals—to avoid trapping moisture.
- Reinforce discreetly and plan ventilation paths at eaves, voids, and cupboards, keeping access for inspection and future maintenance.
Survey Your Historic Coach House (Fabric, Damp, Structure)
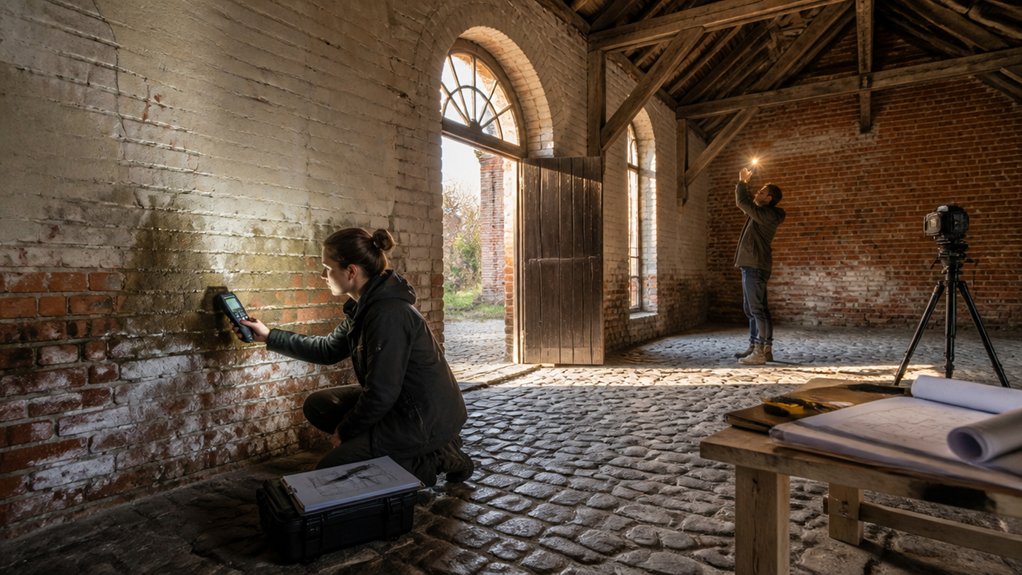
Before you draw up plans, start by surveying the coach house as it really is—not as you hope it’ll be—because historic fabric, hidden damp, and subtle movement will dictate what’s possible.
Walk every bay and lean-to, noting masonry types, mortar hardness, and any cement patches trapping moisture. Check roof lines, gutters, and downpipes, then trace staining to its source.
Probe timbers at bearings, inspect lintels, and map cracks: stepped cracks suggest settlement, wide tapering ones hint movement.
Lift a corner of floor carefully to assess ventilation, rot, and salts.
Photograph details you’ll want to keep for Interior decor, like ironmongery and stable partitions.
Outside, review ground levels, drainage falls, and plantings so your landscaping design won’t drive water toward walls.
Sort Consents Early (Listed Building, Conservation Rules)
Why leave permissions until the builder’s booked, only to discover you can’t touch the roof pitch, swap the joinery, or open up an arch? Start consents early so design, cost, and programme align with listed building controls and conservation area rules. Speak to the conservation officer before you draw; you’ll surface non‑negotiables, acceptable materials, and how Modern extensions should read against the original massing.
- Confirm designation: listed grade, curtilage structures, and any Article 4 directions.
- Map approvals: Listed Building Consent, planning, building regs, and ecology/tree constraints.
- Prepare evidence: measured drawings, heritage statement, method statements, and photo schedule.
- Agree performance approach: energy efficiency upgrades that don’t trap moisture or harm fabric.
Submit early, track conditions, and keep correspondence logged.
Decide What to Restore vs Replace (With a Priority List)
Although it’s tempting to “renew everything,” you’ll get a better outcome—and an easier consent process—by deciding early what you’ll restore, what you’ll repair, and what you’ll replace, then ranking those choices by impact on the building’s significance, cost, and risk.
Start with a room-by-room fabric survey: original doors, windows, trusses, brickwork, stalls, ironmongery. Prioritise “retain and repair” for character-defining elements; patch, splice, and lime-repoint before you consider wholesale replacement.
Next, list “replace like-for-like” items that are beyond saving, specifying matching profiles, species, and finishes.
Finally, earmark discreet upgrades for Modern amenities and energy efficiency—secondary glazing, draught seals, insulation that won’t trap moisture, reversible service routes.
Price each tier, note lead times, and keep a photographic log to justify decisions.
Plan the Layout Around Bays, Headroom, and Access
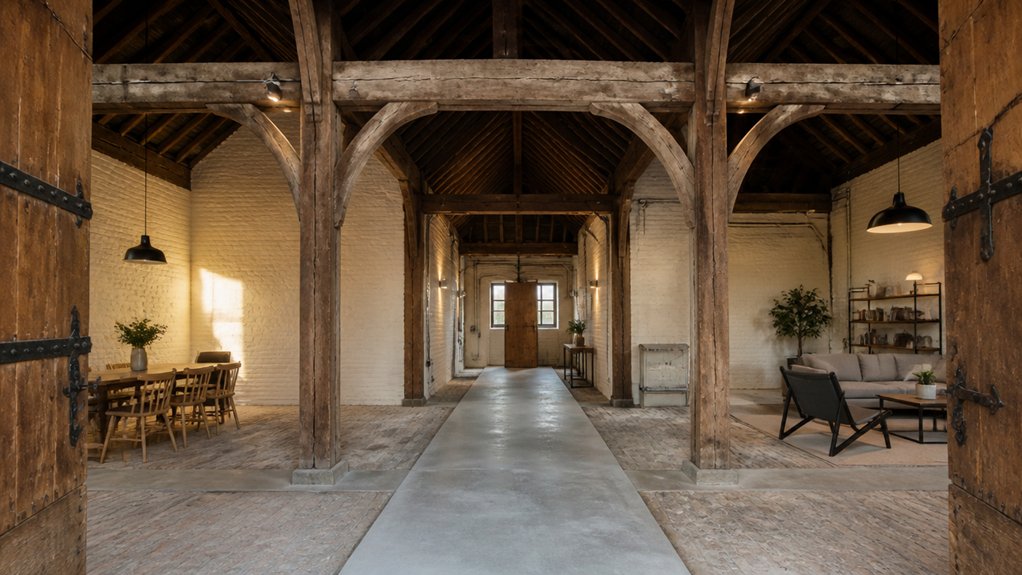
You’ll get the cleanest layout if you keep the original bay rhythm legible, letting openings, posts, and door proportions guide where rooms and circulation land.
You then map headroom bay by bay—watching beam depths, loft lines, and door heights—so you place taller uses where the structure can take them without awkward boxing-in.
Finally, you plan access early: set clear routes for vehicles and people, size new steps and landings carefully, and align any widened doors with existing arches so the fabric reads intact.
Respect Bay Rhythm
- Measure bay-to-bay centers, then align new partitions and built-ins to those increments.
- Keep primary openings centered or paired within bays so elevations stay legible.
- Let structure lead: trace beams, trusses, and joists, and avoid shifting loads off their bay lines.
- Group services and storage in secondary bays so the main volume reads as one coherent span.
Solve Headroom And Access
Because coach houses often hide their tightest clearances at the eaves, over beams, and at stair landings, start your layout by mapping the true headroom and the easiest routes in and out of each bay. Measure finished-floor-to-structure, not just bare framing, and flag spots where ducts, insulation, or new joists would pinch circulation.
For headroom optimization, keep tall uses—showers, wardrobes, door swings—under the highest ridge line, and push low storage, benches, and built-ins into tapering edges.
Choose access solutions that respect original openings: reuse carriage doors for wide entries, add discreet glazed inner doors for weather control, and align new stairs with existing beam spacing.
Where you must alter, notch nothing historic; instead, lower local floor build-ups or rework thresholds.
Strengthen the Coach House Structure Without Covering Fabric
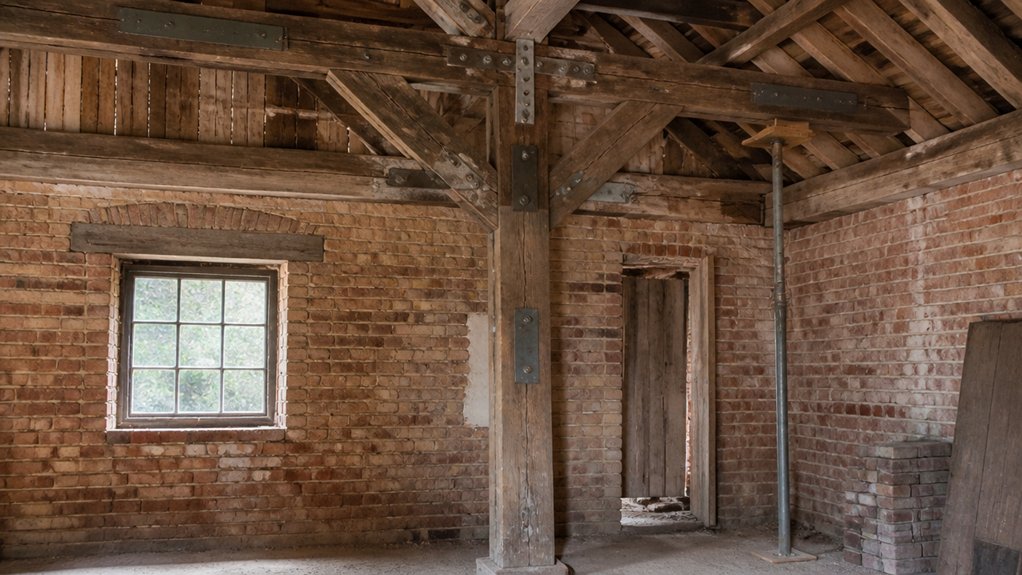
Although a historic coach house often looks sturdy, its framing can hide quiet failures—racked wall planes, undersized joists, split sills, or loose mortise-and-tenon joints—that need reinforcement without burying the original fabric. You’ll get the best result by strengthening from within joints and cavities, leaving boards, plaster, and brick readable and repairable.
Favor Sustainable materials and keep loads predictable if you’re adding Modern heating.
- Re-square bays with concealed timber or steel angle braces set behind existing studs; pin, don’t sheath.
- Sister joists selectively, matching species and depth, and leave a viewing strip at edges for inspection.
- Stitch cracks with epoxy-free timber dutchmen and hardwood pegs; avoid resin saturation.
- Underpin split sills with lime-grouted pads and reversible screw-jacks, then relieve moisture sources.
Run Electrics and Plumbing With Minimal Chasing (Smart Routes)
If you plan your routes before you touch a chisel, you can run electrics and plumbing through existing voids—joist bays, redundant chimney flues, service corners, and behind skirtings—so you don’t have to chase historic brick, plaster, or timber.
Map every circuit and pipe run on a marked-up plan, then confirm depths with a borescope and liftable floorboards.
For Electrical routing, favour surface-mounted conduit in secondary spaces, or slim oval conduit tucked to corners and painted out; keep fixings into mortar joints, not bricks.
Maintain Plumbing access by grouping wet services back-to-back and using removable panels in cupboards, stair voids, or boxed-in corners.
Avoid cutting original joists; drill only where an engineer signs off, and label everything for future work.
Insulate Without Trapping Damp (Add Ventilation Where Needed)
Before you insulate, you assess moisture and airflow in the stonework, floors, and roof voids so you don’t lock in damp.
You then choose breathable insulation—like wood fibre, cork, or lime-based systems—that respects the coach house’s ability to dry out.
Where air needs a controlled route, you add targeted ventilation paths (eaves vents, discreet grilles, or a modest MVHR) to move moisture away without stripping the building’s character.
Assess Moisture And Airflow
Even when the walls look dry, an old coach house can be quietly moving moisture through porous brick, lime mortar, and timber, so you’ll want to map where damp comes from and how air currently escapes before you add any insulation.
Start by monitoring after rain and during heating cycles; note tide marks, salts, musty corners, and cold bridging. Don’t rush to Moisture barriers until you’ve proven the source and exit paths, and plan airflow ventilation that respects original openings.
- Use a pin meter and thermal camera to log damp and temperature gradients.
- Check gutters, downpipes, ground levels, and splashback at thresholds.
- Test subfloor voids, lofts, and boxed-in beams for stagnant air.
- Locate existing vents, flues, and gaps; confirm they actually draw.
Choose Breathable Insulation
Now that you’ve mapped where moisture enters and how air leaves the coach house, choose insulation that works with those drying routes instead of blocking them. Prioritise Breathable insulation—wood fibre boards, hemp, sheep’s wool, or cellulose—so vapour can pass and the structure can dry.
Pair it with vapour-open membranes rather than foil-backed boards, and avoid trapping damp behind impermeable layers. Keep original timbers and masonry visible where you can inspect them later, and leave small service voids so you don’t crush irregular historic surfaces.
Fit insulation snugly to reduce draughts, but don’t over-seal junctions where timber meets stone. Detail window reveals and eaves carefully; that’s where condensation usually starts.
Good Moisture management starts with materials that forgive.
Add Targeted Ventilation Paths
Because insulation changes how a coach house breathes, you should add targeted ventilation paths wherever moisture might otherwise get stranded—at eaves, behind new linings, in boxed-in corners, and around services. Keep the original fabric dry by planning airflow pathways that work with lime, brick, and timber rather than sealing them up.
If you’re adding a ventilation system, choose discreet routes and grilles that don’t scar cornices or old trusses.
- Vent the eaves with continuous vents, but fit insect mesh and maintain slate underfelt gaps.
- Leave a capillary break behind new wall linings using battens, not adhesive dabs.
- Add high/low vents in cupboards and service chases to prevent cold pockets.
- Provide access hatches so you can inspect, clean, and adjust over time.
Repair Coach House Windows and Doors Before Replacing
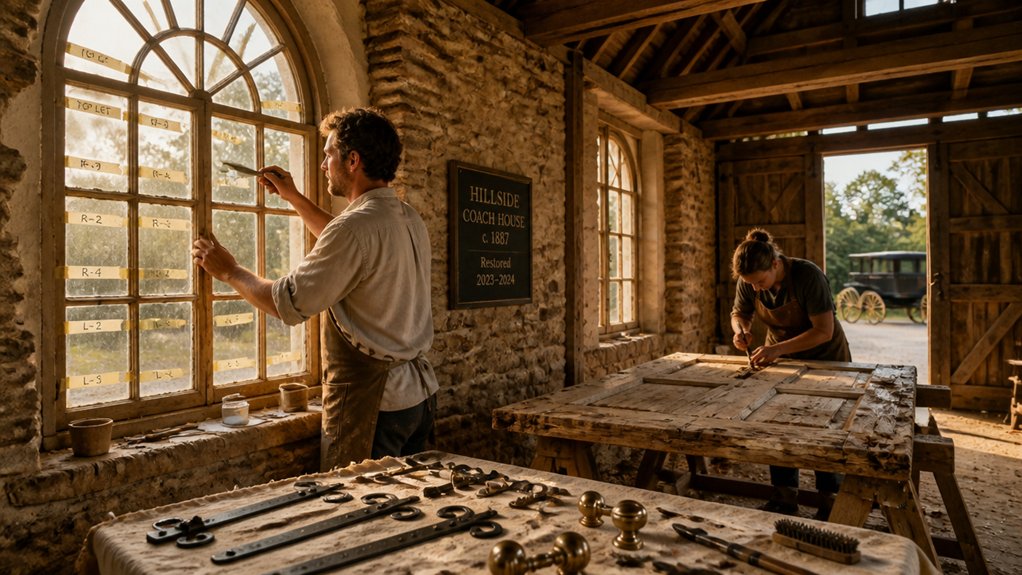
Before you order new units, inspect the coach house’s existing windows and doors with a preservation mindset: old-growth frames, hand-forged hardware, and wavy glass often outperform modern replacements once they’re serviced.
Strip failing Historic paint with lead-safe methods, then probe sills and rails with an awl to map rot and moisture paths.
You can usually save sash by tightening Traditional joinery, pinning loose mortise-and-tenon corners, and splicing in dutchman repairs with matching grain. Reglaze panes, renew glazing points, and bed glass in linseed putty so it flexes with seasons.
Rehang doors: square the frame, reset hinges, and add discreet weatherstripping that doesn’t crush profiles. Clean and oil original locks; replace only missing springs and screws.
When you seal gaps, keep weep routes open so water can escape and timber can dry.
Choose Heritage-Friendly Materials That Patinate Over Time
Even if you’re tempted by “maintenance-free” finishes, you’ll get a more authentic—and often longer-lived—result when you choose materials that weather gracefully alongside the original fabric. Patina signals age honestly, and it also reveals problems early, so you can intervene before decay spreads. Skip brittle Modern coatings that trap moisture, and be wary of Synthetic alternatives that can’t move or breathe like historic assemblies.
- Choose lime mortar over hard cement so walls can dry outward.
- Specify unfinished oak, larch, or Douglas fir; oil them, don’t plastic-seal them.
- Use leaded or hand-drawn glass repairs and putty that stays flexible.
- Select zinc, copper, or terne metal for flashings; they self-heal and age quietly.
Conclusion
Renovating your coach house works best when you slow down, read the building, and let its quirks lead the design. You’ve surveyed the fabric, secured consents, chosen repair over replacement, and planned services and insulation that won’t lock in damp. Keep detailing discreet, use breathable, time-tested materials, and protect original doors, windows, and joinery wherever you can. When every decision respects patina and proportion, isn’t that how you keep its soul alive?
About the Author